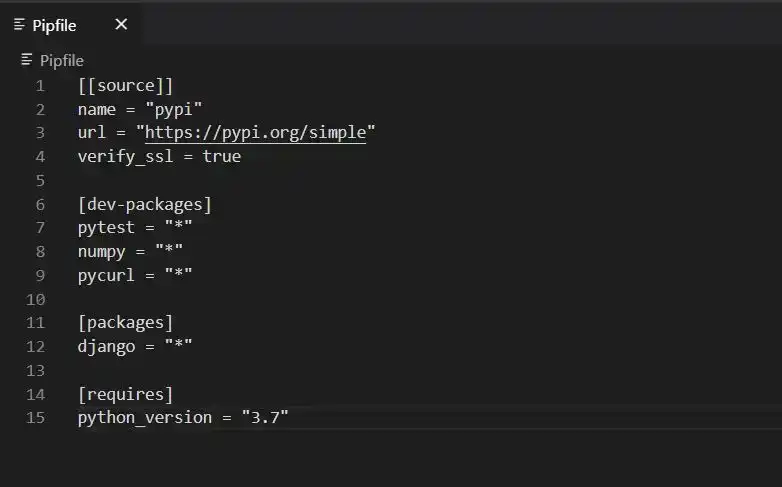
pipenv 의 pipfile 와의 만남
python 프로젝트 패키지 관리할때 항상 requirements.txt 로 관리했었고, 실행 환경은 virtualenv, conda 를 사용했었다.
그러던 어느날..
requirements.txt 는 없고 pipfile pipfile.lock 이 있는게 아닌가!?
pipfile, pipfile.lock !? 첫인상은 node.js 의 버전관리 냄새가 물씬 느껴지는 패키지 관리방법이다.
알아보도록하자.
pip + virtualenv = pipenv ??
pipenv readthedocs 내용이다.(https://pipenv-fork.readthedocs.io/en/latest/)
The problems that Pipenv seeks to solve are multi-faceted:
- You no longer need to use pip and virtualenv separately. They work together.
- Managing a requirements.txt file can be problematic, so Pipenv uses Pipfile and Pipfile.lock to separate abstract dependency declarations from the last tested combination.
- Hashes are used everywhere, always. Security. Automatically expose security vulnerabilities.
- Strongly encourage the use of the latest versions of dependencies to minimize security risks arising from outdated components.
- Give you insight into your dependency graph (e.g. $ pipenv graph).
- Streamline development workflow by loading .env files.
개인적인 설명은 virtualenv + pip 와 합쳐진 모듈이며, dev 버전의 모듈을 별도로 관리할 수 있는 기능이 있다. npm의 모듈처럼 scripts 도 작성 가능하다.
설명은 이러하나 감이 잘 안오니 사용해 보자.
pipenv 설치
# Fedora
sudo dnf install pipenv
# Debian buster
sudo apt install pipenv
# mac
brew install pipenv
# windows / 위의 옵션으로 설치 안될때
python -m pip install pipenv
pipenv install
pipfile 과의 만남 (기존 pipfile 로 부터 설치)
# pipfile
[[source]]
name = "pypi"
url = "https://pypi.org/simple"
verify_ssl = true

[dev-packages]
pdbpp = "*"

[packages]
mysqlclient = "==1.4.6"
djangorestframework = "==3.11.0"
django-filter = "==2.2.0"
channels = "==2.4.0"
channels-redis = "==2.4.2"
pytz = "*"
Django = "==3.0.7"
Markdown = "==3.2.1"
pipfile 이 있는 경로에서 pipenv install을 하면 된다.
packages 와 dev-packages 모두 설치하고 싶으면 pipenv install --dev 를 하면된다.
설치시 virtualenv 가 어딘가에(?) 설치되며, 그 안의 모듈들이 설치된다.
# install with pipfile
pipenv install
# pipenv install --dev

# virtualenv path 확인
pipenv --venv
virtualenv 경로
virtualenv 의 경로
Pipenv automatically honors the WORKON_HOME environment variable, if you have it set — so you can tell pipenv to store your virtual environments wherever you want, e.g.:
export WORKON_HOME=~/.venvsIn addition, you can also have Pipenv stick the virtualenv in project/.venv by setting the PIPENV_VENV_IN_PROJECT environment variable.
virtualenv 경로가 맘에 안든다면 환경변수를 설정하거나 프로젝트안에 .venv 폴더를 생성하여, 설치를 진행하자
cd project
mkdir .venv
# install with pipfile
pipenv install
# pipenv install --dev

# virtualenv path 확인
pipenv --venv
pipfile 생성시
(windows OS 의 경우) 기존 pipfile이 없는경우 pipfile을 생성하고자 할 때는 환경변수 path에 python이 없다면
python 옵션을 사용하여 명시적으로 버전을 작성해야 에러가 나지 않는다.
cd project
mkdir .venv
pipenv install --python python # python path
이때 pipfile 에 requires 가 생성되는데, 권장하지는 않지만 삭제해도 된다.
[requires]
python_version = "3.7"
The inclusion of [requires] python_version = "3.6" specifies that your application requires this version of Python, and will be used automatically when running pipenv install against this Pipfile in the future (e.g. on other machines).
If this is not true, feel free to simply remove this section.
pipfile 패키지 추가 (설치)
pipfile 에 패키지를 추가하고 싶다면 pipenv install package 를 하면된다.
# pipfile 에 package 추가시
pipenv install <package>
# (dev) pipfile 에 package 추가시
pipenv install <package> --dev
기존 requirements.txt 와 사용하기
기존 requirements.txt 를 가져와 설치도 가능하다. (pipfile 작성을 새로 하는게 더 좋은 방법이다.)
pipenv install -r requirements.txtShell (virtualenv 실행)
이제 실행해보자!
shell 명령어로 virtualenv 를 실행 할 수 있다.
# virtualenv 실행 (activate)
pipenv shell
# deactivate
exit
버전 설치 방법
특정 버전대로 패키지를 설치하는경우가 많으니 requests~=2.2 과 같은 방식으로 설치하자
$ pipenv install "requests>=1.4"   # will install a version equal or larger than 1.4.0
$ pipenv install "requests<=2.13"  # will install a version equal or lower than 2.13.0
$ pipenv install "requests>2.19"   # will install 2.19.1 but not 2.19.0
$ pipenv install "requests~=2.2"  # locks the major version of the package (this is equivalent to using ==2.*)

# To avoid installing a specific version you can use the != identifier.
pipenv graph
requirements.txt 의 경우, 왜 이패키지가 설치되었는지 몰랐던 경우도 있었는데 pipenv graph 를 사용하면 한눈에 볼 수 있다.
pipenv graph

Django==3.0.8
  - asgiref [required: ~=3.2, installed: 3.2.10]
  - pytz [required: Any, installed: 2020.1]
  - sqlparse [required: >=0.2.2, installed: 0.3.1]
numpy==1.19.0
pytest==5.4.3
  - atomicwrites [required: >=1.0, installed: 1.4.0]
  - attrs [required: >=17.4.0, installed: 19.3.0]
  - colorama [required: Any, installed: 0.4.3]
  - importlib-metadata [required: >=0.12, installed: 1.7.0]
    - zipp [required: >=0.5, installed: 3.1.0]
  - more-itertools [required: >=4.0.0, installed: 8.4.0]
  - packaging [required: Any, installed: 20.4]
    - pyparsing [required: >=2.0.2, installed: 2.4.7]
    - six [required: Any, installed: 1.15.0]
  - pluggy [required: >=0.12,<1.0, installed: 0.13.1]
    - importlib-metadata [required: >=0.12, installed: 1.7.0]
      - zipp [required: >=0.5, installed: 3.1.0]
  - py [required: >=1.5.0, installed: 1.9.0]
  - wcwidth [required: Any, installed: 0.2.5]
https://pipenv-fork.readthedocs.io/en/latest/advanced.html#custom-script-shortcuts
그 외 scripts 를 사용하여 pipenv run 으로 특정 스크립트를 실행 할 수 있으니 잘(?) 활용하면 좋을듯하다.
https://pipenv-fork.readthedocs.io/en/latest/advanced.html#configuration-with-environment-variables
환경변수 설정관련해서 direnv 를 언급했는데 좋아보인다! 기회가 되면 사용해보자.